Learning Download: How to Grow Greens
From Seed to Harvest: A guide to growing greens.
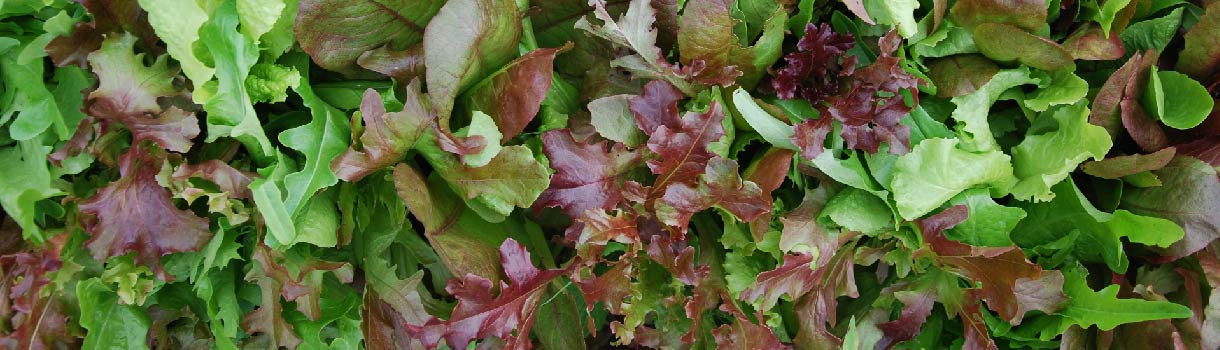
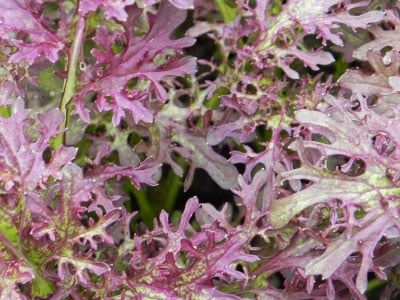
Greens can include anything from mustard greens to bok choy and arugula, and the leafy vegetables have a wide range of uses as well, such as steaming mustard greens or using greens in salads. Greens offer many micronutrients and taste profiles, with tastes ranging from the spicy bite of mustard greens and arugula to the sweet, delicate leaves of a spring mix.
To plant:
Greens are a cool-weather crop, and are oftentimes easy to start from seed. Plant them outside three weeks before the last frost date. For a fall harvest, begin planting greens seeds mid-summer. Plant each seed just under the soil, about 1/2 inch apart. Once seedlings show, thin them to 3 inches apart. Plant new seeds every three weeks for a continuous harvest.
To grow:
Greens like plenty of sun, but can tolerate partial shade, and they require 2 inches of water per week. Keep the area weed free, especially when the greens are young. Use row covers to keep pests away and to grow pristine leaves. Greens can be grown in a container or a pallet garden if a gardener is lacking space.
To harvest:
Greens can be harvested by cutting down the entire plant or picking each leaf individually as they grow. Discard any yellow leaves, and pick the leaves when they are young and tender, as older and larger leaves taste more bitter. Greens will often grow more leaves once some of the leaves are harvested. To continue the plant’s growing season, use small shears and remove all the laves from the stalk, but leave the stalk. Fertilize and water, and more leaves will grow.
What greens crave:
Leafy greens need nutrients available in 5-10-10 and 10-10-10 fertilizers, as well as organic options like bone meal, blood meal and dehydrated manure. Following the instructions on the container, spread the fertilizer evenly across the greens. Mix the fertilizer into the top 2 inches of soil prior to planting. Seeds are sensitive to fertilizer, so mixing it with the soil before planting will help prevent any problems.
Where to buy greens seeds:
You can find a large array of greens, including salad mixes, arugula, bok choy, mustard greens seeds seeds and more at Urban Farmer.
Learning Download: How to Grow Mustard Greens
From Seed to Harvest: A guide to growing mustard greens.
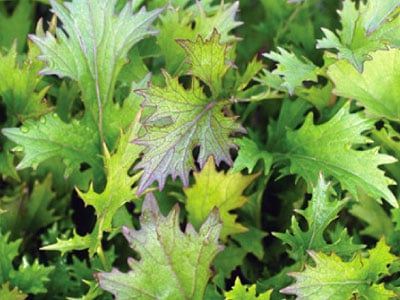
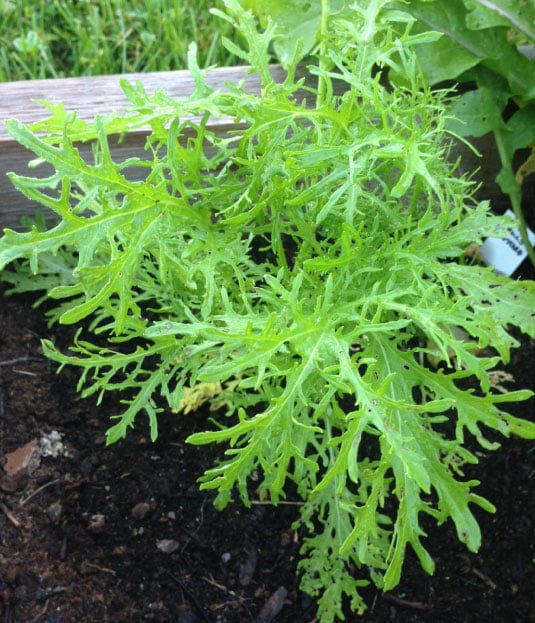
Mustard greens are healthy, quick and easy to grow, so even if gardeners are unfamiliar with growing mustard greens, it is easy to learn.
To plant:
Begin mustard greens seeds indoors three weeks prior to your last frost. Plant the seeds just barely under the surface of the soil and space them about a half inch apart. Once seedlings sprout, thin them to 3 inches apart. If you are planting in the fall, plant the mustard green seeds four to six weeks before the first frost for a late fall harvest.
To have a continuous harvest, practice succession planting and keep planting mustard green seeds every few weeks after you begin the first planting.
To grow:
Mustard greens don’t require a lot of care, but make sure they are growing in full sun or partial shade. Mustard greens can tolerate partial shade since they only produce leaves and not fruit, such as tomatoes. These are cool-season greens, so they like cooler weather and they also grow very quickly. Provide the greens with at least 2 inches of water each week. Make sure to keep the mustard greens bed weed free so the weeds don’t crowd the greens or possibly bring in unwanted diseases or pests.
To harvest:
Mustard greens should be harvested when they are young and tender because older leaves are tough and will get increasingly bitter as they age. If you notice any yellow leaves appearing on the plant, discard them. You can harvest mustard greens by either picking out the whole plant or picking individual leaves. When you pick individual leaves and don’t uproot the whole plant, it allows the plant to continue to grow throughout the season. You can even freeze the mustard greens you harvest and use them later on.
What mustard greens crave:
Since the mustard greens are such fast growers, they oftentimes don’t need fertilizer. You can amend soil with compost prior to planting, and then if you desire, you can fertilize once with a balanced fertilizer during the growing season.
Where to buy mustard greens seed:
You can find mustard greens seed at Urban Farmer.
Learning Download: How to Grow Quinoa
From Seed to Harvest: A guide to growing quinoa greens.
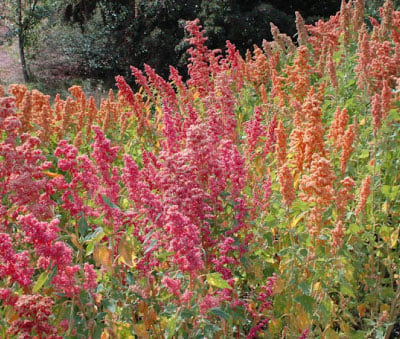
Quinoa greens are mild and they are packed with many vitamins and minerals. If you harvest the seeds, they can be ground into flour, which is gluten free. Quinoa is easy to grow.
To plant:
Direct sow the quinoa seeds in late April or early May, when the soil temperatures are between 65 and 75 degrees Fahrenheit. Seeds will germinate within 4 to 10 days. Sow the seeds 1/4 inch deep and space 10 seeds per 12 inches. However, if you are planning to use the very young leaves instead of letting quinoa reach its potential, you may space the plants closer together.
To grow:
Quinoa greens do best when grown in soil with a pH of 6.0 . to 7.5. I t prefers well-drained, loamy soil and can benefit from added organic matter, as well. Keep the beds well weeded so the weeds don’t take energy from the quinoa plants. Weeds also can bring in unwanted pests and diseases. Other than those few suggestions, quinoa is mostly drought tolerant and even looks good as a backdrop or border for flower beds. Keep in mind that young seedlings may be susceptible to slug or snail damage. If you keep the beds free from debris, it should help cut down on pests. Only water the plants if they seem excessively dry.
To harvest:
Quinoa is mostly used for its seed, which serves as a great grain dish, but quinoa can also be harvested for its greens. The quinoa plant is related to the beet plant, which also can be harvested for its green. If harvesting for leaves, harvest the eaves when they are young by plucking them from the plant. However, if you hope to harvest the quinoa seeds to use as grain, the seeds are ready when they fall easily out of the seed head. The easiest ways to harvest are to use a bag and hit the seed heads against the inside of the bag so the seeds fall off into the bag. Be sure to wash the seeds before eating them because they are coated with saponin, a bitter tasting substance that protects the seed from birds.
What quinoa craves:
Quinoa responds well to nitrogen fertilizer, so if you wish to boost your quinoa’s growth, add a nitrogen fertilizer.
Where to buy quinoa seeds:
You can find quinoa seeds at Urban Farmer.
Learning Download: Common pests and diseases: Greens
Common pests and diseases: Greens
When growing vegetables, it is always exciting to care for the plant throughout its growing phase and then harvest it for delicious recipes later on, but one thing to watch out for is pests and diseases. Different plants are susceptible to different types of pests and diseases, and it is important to make yourself aware so you can keep a watchful eye and also take any preventative methods to keep your plants safe throughout their lifespan.
Greens can fall victim to several different pests and diseases.
Pests:
The most common pest affecting all different types of greens is the aphid or the leafhopper. Aphids and leafhoppers both can easily spread diseases amongst lettuce plants.
Aphids are small, soft-bodied insects and they come in colors green, yellow or purple. Leafhoppers will be green-yellow and small. if you notice either of these pests on your greens, spray them with an insecticidal soap every 10 days to discourage them. To help prevent an infestation, continuously weed your greens because unwelcome weeds may serve as the home to leafhoppers.
Greens like chicory and curly cress have less problems with pests due to their pungency. Another common insect problem comes from leaf miners. These insects feed mostly o spinach, chard, beet and turnip greens. The larvae tunnel between the leaves’ tissue, and it causes tan-colored splotches on the leaves’ surfaces. Cover your crops with screens to control this pest.
Diseases:
Some of the most common diseases affecting greens include bottom rot, tip burn and leaf spot.
Bottom rot will create rust-colored spots on the lower leaves first, and then these spots spread until the entire head has rotted. Once a plant is infected, you should harvest it, keep the usable portions and destroy the rest. Do not compost the plant. To prevent this disease, reduce crop disease by cleaning up the garden after you harvest and rotate your crops regularly.
Tip burn mostly affects head lettuce. It will cause the leaves to turn brown and then die. This problem is caused by hot weather and will most likely occur if there is fluctuation in the soil moisture. To prevent this problem, keep the plants evenly moist and plant resistant varieties. Also ensure your lettuce is spaced correctly so there is plenty of air circulation.
Leaf spot mostly affects greens like beets and chards. The spots will develop on the greens’ leaves, and will affect the oldest leaves the worst. The leaves, once infected, will turn yellow and likely die. If you notice this issue, pick off the affected leaves and destroy them. If there is a severe infection, use fungicides to help control the problem. To prevent this from occurring, regularly rotate your crops.
